 Skip to content
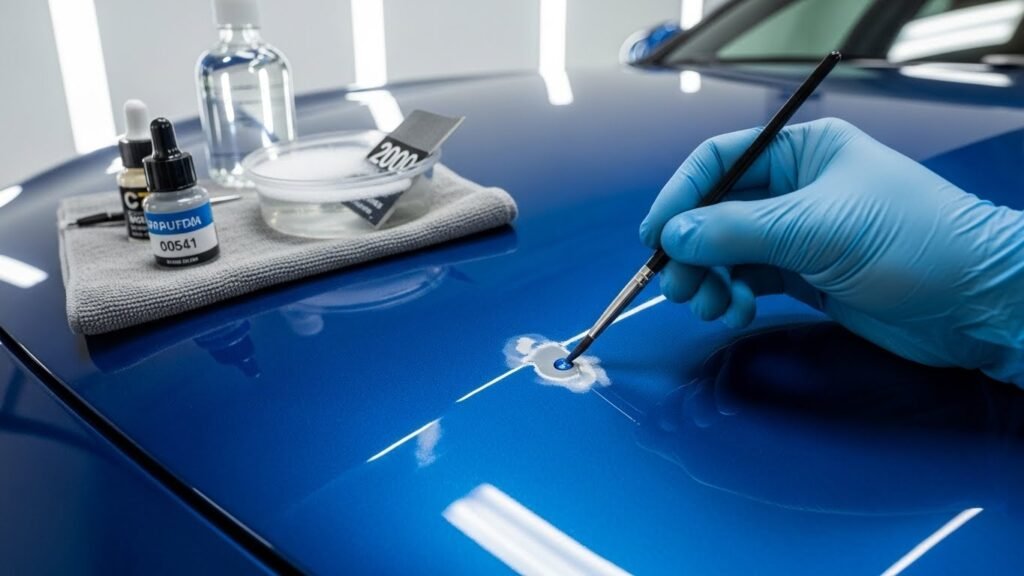
Car paint chip repair is a skill every owner should learn. Road debris like small rocks can hit your car at any time. These stone chips look bad and make your car look old. More importantly, they expose the bare metal of your vehicle to the air. This leads to rust and corrosion that can spread under the paint. Fixing these spots quickly saves you money on expensive body shop bills. You can get professional results right in your own driveway.
Understanding Paint Chips and Why They Matter
Modern car paint is not just one thick layer of color. It is a complex system of layers designed to protect the metal. When you understand these layers, your car paint chip repair will look much better.
The Anatomy of Car Paint
- The Clear Coat is the top see-through layer that provides shine and UV protection.
- The Base Coat is where the actual color of your car lives.
- The Primer sits under the color to help the paint stick to the car.
- The Metal Substrate is the actual body panel of your vehicle that needs protection from water.
The Risks of Neglect
- Oxidation begins the moment oxygen touches the raw metal surface.
- Structural Rust happens when moisture gets trapped under the paint edges.
- Paint Delamination occurs when the surrounding paint starts to peel away from the chip.
Economic Impact
- Resale Value drops significantly when a car has visible rock chips and scratches.
- Curb Appeal is ruined by small black or brown dots on the hood and bumper.
- Long-term Costs rise because small chips eventually require full panel repainting.
Common Causes
- Road Debris like gravel and pebbles are kicked up by tires from other cars.
- Impact Damage happens from hail or even large insects hitting the car at high speeds.
- Environmental Factors such as salt on winter roads can eat through thin paint.
Understanding the Science of Automotive Paint
Car paint chip repair is a chemical process as much as an art. You are trying to bond new liquid material to a hardened factory finish.
The Multi-Stage Factory Finish
- E-Coat is the first layer applied at the factory to prevent rust.
- Primer Layers smooth out the metal so the color looks perfectly flat.
- Base Coat contains the pigments and metallic flakes that give the car its look.
- Clear Coat acts as a hard shield against bird droppings and rain.
Why Chips Spider
- Impact Stress creates tiny cracks in the clear coat around the main hole.
- Thermal Expansion causes the metal to grow and shrink, which pulls on the paint edges.
- Contaminant Seepage allows wax and oil to get under the paint, lifting it up.
Substrate Identification
- Steel Panels are magnetic and will turn orange with rust very quickly.
- Aluminum Panels do not rust but can corrode into a white powder.
- Plastic Bumpers will never rust but require flexible paint additives to stay bonded.
The Chemistry of Rust
- Iron Oxide is the scientific name for the rust that eats your car.
- Electrochemical Reactions happen when water sits on bare steel for even a few hours.
- Corrosion Spreading is like a disease that moves under the healthy paint.
Pre-Repair Evaluation and Damage Assessment
Before you start your car paint chip repair, you must look closely at the damage. Not every chip is fixed the same way.
Categorizing the Damage

- Surface Nicks only affect the clear coat and often look like white marks.
- Deep Chips go all the way to the primer and show a grey or tan color.
- Rock Rash is a cluster of many tiny chips usually found on the front bumper.
The Fingernail Test
- Surface Scratches are safe if your fingernail does not catch in the groove.
- Deep Grooves that catch your nail mean you must add new paint to the area.
When DIY Is Not Enough
- Crazing looks like a spider web of cracks and usually means the paint is old.
- Checking happens when large flakes of paint are falling off the car.
- Large Dents require a professional body shop to pull the metal back into shape.
Preparation: Setting the Stage for Success
Good preparation is eighty percent of the work in car paint chip repair. If the surface is dirty, the new paint will just peel off.
Ideal Working Conditions
- Temperature should be between 50 and 85 degrees Fahrenheit for the best drying.
- Shade is better than direct sunlight because the sun dries the paint too fast.
- Low Wind prevents dust and hair from blowing into your wet paint.
Identifying Damage Types
- Stone Chips are usually round and deep from a direct hit.
- Key Marks are long and narrow and often cover several panels.
- Scuffs are wide areas where the paint has been rubbed away by something soft.
Marking the Work Area
- Blue Masking Tape helps you find the chips after you cover the car in soap.
- Distance should be kept between the tape and the chip so you have room to work.
Decontamination
- Initial Wash removes the heavy mud and road salt from the entire car.
- Chemical Cleaning with rubbing alcohol removes the hidden wax and oils.
- Moisture Management is key because paint will not stick to a damp surface.
Essential Tools and Materials Checklist
You need the right gear to get a pro look for your car paint chip repair. Most of these items are found at local auto parts stores in Houston or online.
Cleaning Supplies
- Microfiber Towels are soft and will not scratch your healthy paint.
- Nitrile Gloves keep your skin oils off the car and the paint off your hands.
- Isopropyl Alcohol is the best way to make the surface perfectly clean.
Abrasives
- 2000-Grit Sandpaper is very fine and helps blend the new paint in.
- Sanding Blocks keep the pressure even so you do not sand a hole in the paint.
Paint Options
- Paint Code is found on a sticker in your door jamb or under the hood.
- Single Stage Paint has the color and shine mixed together in one bottle.
- Touch-Up Kits like Dr. ColorChip are great for beginners and small chips.
Application Tools

- Micro Brushes are much better than the big brushes that come in the bottle.
- Toothpicks allow you to put a tiny drop of paint exactly where you want it.
Finishing Products
- Polishing Compound brings back the shine after you finish sanding the spot.
- Carnauba Wax protects your hard work from the Texas sun.
Preparation: The Foundation of a Lasting Repair
You cannot rush the cleaning phase of car paint chip repair.
Deep Cleaning the Canvas
- Two-Bucket Wash keeps dirt from going back onto the car during the cleaning.
- Clay Bar removes tiny metal bits that are stuck in the paint surface.
Stripping the Protection
- Old Wax must be removed or the new paint will just slide right off.
- Ceramic Coatings are very hard to paint over and need extra cleaning.
Pre-Sanding the Crater
- Smooth Edges help the new paint transition perfectly into the old paint.
- Removing Rust with a small tool is vital before you cover it with paint.
Masking for Safety
- Protecting Trim with tape prevents you from getting paint on plastic or rubber.
- Boundary Setup keeps your sanding limited to just the area that needs it.
The Step-by-Step Repair Process

Now it is time to actually perform the car paint chip repair. Take your time and stay calm.
Preparing the Chip Surface
- Scrape any loose flakes of paint away with a clean toothpick.
- Wipe the area one last time with alcohol to remove fingerprints.
Precision Paint Application
- Shake the Paint for at least two minutes to mix the heavy metallic flakes.
- Dab the Paint into the center of the chip and let it spread to the edges.
- The Thumb Method can be used to smear the paint flat if you are using a kit.
- Build Layers instead of trying to fill a deep hole with one big drop.
- Overfill Slightly because the paint will shrink as the solvents dry out.
Professional Blending and Leveling

- Chemical Blending uses a special liquid to wipe away the excess paint.
- Wait Times are important so you do not pull the wet paint out of the hole.
- Wet Sanding levels the high spot until you cannot feel it with your finger.
Restoring the High-Gloss Finish
Your car paint chip repair will look dull after sanding. Polishing brings the life back to the spot.
Polishing and Buffing
- Apply Compound to a soft cloth and rub the area in small circles.
- Check the Shine often to make sure it matches the rest of the panel.
- Buffing removes the hazy look left behind by the fine sandpaper.
Adding the Clear Coat
- Seal the Color by adding a final layer of clear if your paint kit requires it.
- Gloss Match is easier if you use a clear coat that has a high shine.
The Final Seal
- Wax the Area only after the paint has had enough time to fully dry.
- UV Protection from the wax keeps the new paint from fading in the sun.
Advanced Troubleshooting and Pro Tips
Even the pros run into trouble with car paint chip repair sometimes.
Metallic Paint Challenges
- Flake Orientation can change how the color looks from different angles.
- Mix Often to keep the metal bits from sinking to the bottom of the cup.
Vertical Surface Application
- Gravity will try to make your paint run down the door or fender.
- Thin Coats are the only way to prevent drips on vertical panels.
Dealing with Deep Craters
- Patience is required to fill a hole that goes deep into the metal.
- Day Intervals between coats give each layer a chance to get hard.
When to Call a Professional
Sometimes car paint chip repair is too big for a DIY weekend.
- Scale of Damage matters if the entire hood is covered in hundreds of chips.
- Dents and Creases usually require metal work that touch-up paint cannot fix.
- Exotic Paints like matte finishes or three-stage pearls are very hard to match.
Long-Term Prevention and Maintenance
Once you finish your car paint chip repair, you want to keep it looking good.
Paint Protection Film (PPF)
- Clear Bras are thick plastic films that stop rocks from ever hitting the paint.
- High Impact Zones like the front bumper and mirror caps benefit most from film.
Distance Driving
- Safe Following gives rocks time to fall back to the ground before hitting you.
- Avoid Trucks that are carrying gravel or dirt as they drop many stones.
Routine Maintenance
- Regular Waxing makes the surface slick so some debris just slides off.
- Prompt Repairs prevent a tiny nick from becoming a giant rust hole.
Post-Repair Maintenance Schedule to Protect Your Car Paint
Once you finish your car paint chip repair, you want to keep it looking good. Proper maintenance ensures that your hard work lasts and that the new paint bond remains strong against the elements.
Immediate Care: The First 48 Hours
- Avoid Water Contact for the first 24 to 48 hours to allow the paint “plug” to harden.
- Park in the Shade to prevent direct sunlight from over-heating the fresh repair and causing it to bubble.
- No High-Pressure Washes should be used, as the force can pull a fresh repair right out of the chip.
Short-Term Maintenance: 2 to 4 Weeks
- Gentle Hand Wash Only using the two-bucket method to prevent introducing new scratches.
- Monitor the Repair to see if any shrinking has occurred, which may require a small additional layer.
- Avoid Automatic Car Washes for at least two weeks to ensure the paint has fully outgassed and hardened.
Long-Term Protection: 30 to 90 Days
- Apply Carnauba Wax only after the paint has had enough time to fully dry and cure.
- UV Protection from regular waxing keeps the new paint from fading in the sun and helps it match the rest of the car.
- Prompt Repairs are essential; fixing a new nick immediately prevents it from becoming a giant rust hole.
Permanent Prevention Strategies
- Install Paint Protection Film (PPF) on high-impact zones like the front bumper and mirror caps to stop rocks from ever hitting the paint again.
- Maintain Safe Following Distance to give rocks and debris time to fall back to the ground before they can hit your vehicle.
- Avoid Gravel Trucks and vehicles carrying loose dirt, as they are the primary source of road debris that causes chips.
Finding Your Vehicle Paint Code for Car Paint Chip Repair

Finding the right color is the most important part of a car paint chip repair. Every car has a specific paint code that tells you exactly which shade of color was used at the factory. If you use the wrong code, the repair will stand out and look like a dark or light spot on your car.
Where to Look for the Paint Code
- The Driver’s Side Door Jamb is the most common place to find a sticker with the paint code.
- Inside the Glove Box is another frequent location for a manufacturer’s identification plate.
- Under the Hood near the radiator or on the firewall often contains the paint information.
- The Spare Tire Well or inside the trunk lid is a common spot for many European and domestic brands.
- The Vehicle Identification Number (VIN) can be used by a dealership to look up your exact color in their computer system.
Understanding the Code Format
- Numerical Codes are common for brands like Ford or General Motors and usually have three or four digits.
- Alphanumeric Codes use both letters and numbers, which is standard for many Asian and European vehicles.
- Color Names like “Deep Sea Blue” are helpful, but the code is more accurate for matching metallic flakes.
Tips for a Perfect Match
- Check for Sunlight Fading because older cars might have paint that has changed color over time.
- Shake the Paint Bottle for at least two minutes to ensure all the pigments and flakes are mixed before testing the color.
- Test on a Hidden Area like the bottom of a door to make sure the color matches before applying it to the hood.
Pro Tips for Working with Metallic and Special Paint Finishes
Working with metallic or pearl finishes requires extra care during a car paint chip repair because these paints contain tiny flakes that must sit correctly to match the rest of the car. If the flakes are not distributed evenly, the repair may look darker or lighter when viewed from different angles.
Mastering Metallic Paint Challenges
- Agitate the Paint Thoroughly by shaking the bottle for at least two minutes to prevent heavy metallic flakes from settling at the bottom.
- Mix Frequently during the application process if you are using a small cup or container to keep the pigments and flakes consistent.
- Avoid Heavy Blobs because thick drops of metallic paint often cause the flakes to sink, creating a “mottled” or uneven look.
- Check the Angle of Light frequently to ensure the flake orientation matches the surrounding factory finish.
Managing Vertical Surface Applications
- Fight Gravity by applying very thin coats to prevent the wet paint from running down doors or fenders.
- Use Minimal Paint on your micro-brush or toothpick to ensure the liquid stays within the boundaries of the chip.
- Allow Proper Flash Time between layers so each coat can “tack up” and hold its position on the vertical panel.
Handling Deep Craters and Impact Points
- Practice Patience when filling holes that reach the bare metal substrate, as these require several days to fill properly.
- Use Day Intervals between applications to allow the solvents in each layer to evaporate and the paint to harden.
- Build the Foundation with a primer if the metal is exposed to ensure the color coats bond securely and resist rust.
Special Considerations for Matte and Exotic Finishes
- Avoid Polishing Matte Paint because standard abrasives will create a permanent shiny spot that ruins the flat finish.
- Consult a Professional for three-stage pearl or matte colors, as these are extremely difficult to replicate with standard DIY tools.
- Check for Flex Agents if you are repairing a plastic bumper to ensure the new paint can move with the panel without cracking.
FAQs About Car Paint Chip Repair
Can I use a regular paintbrush for car paint chip repair?
Standard paintbrushes from a craft store are usually too large and hold too much paint, leading to messy “blobs”. It is better to use specialized micro-brushes or even a toothpick to drop a tiny amount of paint exactly where it is needed.
What happens if I perform a car paint chip repair in direct sunlight?
Direct sunlight heats the metal panel, causing the paint to dry almost instantly before it can level out. This often results in a bumpy, uneven finish that is much harder to sand down later.
Is it possible to fix a chip on a plastic bumper?
Yes, you can fix chips on plastic, but the process is slightly different because plastic does not rust. However, plastic bumpers flex, so using a paint with a “flex agent” can help prevent the repair from cracking later.
How do I find the exact paint code for my vehicle?
Manufacturers hide the paint code in different spots like the driver’s side door jamb, under the hood, or in the glove box. You can also call a local dealership with your VIN to get the exact color name and code for a perfect car paint chip repair.
Should I use a primer if the chip is very shallow?
If the chip only went through the clear coat or the very top of the base coat, a primer is not necessary. Primer is only required when you see bare metal or plastic to ensure the new paint has something to grab onto.
Can I fix road rash with a single touch-up pen?
Touch-up pens are difficult to use for “road rash,” which consists of hundreds of tiny nicks. For this type of damage, specialized kits that allow you to smear and wipe the paint are much more efficient than dabbing each spot individually.
Why does my new paint look darker than the rest of the car?
This usually happens if the original paint has faded from the sun over several years. It can also happen if the paint was not shaken long enough to mix the metallic flakes or pigments properly.
How long should I wait before washing my car after a repair?
You should wait at least 24 to 48 hours before doing a gentle hand wash. Avoid high-pressure automatic car washes for at least two weeks to ensure the paint “plug” has hardened completely.
Can I use nail polish as a temporary car paint chip repair?
While nail polish might match the color, it does not have the same chemical durability or UV protection as automotive paint. It will likely peel off or yellow within a few weeks of exposure to the elements.
What is the difference between a paint scratch and a paint chip?
A chip is usually a round or jagged hole caused by an impact, while a scratch is a linear mark caused by something dragging across the surface. Both require similar cleaning steps, but scratches often need a “fluid writer pen” for a steady application.
Will wet sanding ruin my surrounding clear coat?
If you use the correct high-grit sandpaper (like 2000 or 3000 grit) and plenty of soapy water, you will not ruin the clear coat. You are simply scuffing the surface, which is easily restored with a polishing compound.
Can I fix a paint chip if it has already started to rust?
Yes, but you must remove every bit of brown rust first using a tiny wire brush or a fiberglass pen. If you paint over rust, it will continue to grow underneath the new paint and eventually cause the repair to fail.
How many layers of paint should I apply to a deep chip?
It is best to apply two to three thin layers rather than one thick one. Waiting about 15 to 20 minutes between layers allows the solvents to evaporate so the paint dries harder.
Does humidity affect the car paint chip repair process?
High humidity can trap moisture under the paint or cause the clear coat to look “cloudy” or “blushed”. It is ideal to work on a dry day with humidity below 60% for the best chemical bond.
Can I use a hair dryer to speed up the drying time?
A hair dryer on a low, warm setting can help speed up the process, but you must be careful not to get the paint too hot. Excessive heat can cause the paint to bubble or “skin over,” leaving the bottom of the chip wet.
What is a “clear bra” and does it help?
A clear bra is a transparent film applied to the front of the car to absorb the impact of rocks. It is the most effective way to prevent the need for future car paint chip repair on high-impact areas like the hood.
Is it necessary to wax the entire car after fixing one chip?
No, you only need to wax the area you repaired and polished. However, waxing the whole car ensures the protection is even and gives the entire vehicle a uniform shine.
Why does the paint kit come with a blending solution?
Blending solutions are designed to chemically level the touch-up paint so you don’t have to use sandpaper. This is a safer method for beginners who are worried about damaging their factory clear coat.
Can I fix chips on a matte or satin paint finish?
Matte paint is extremely difficult to repair because you cannot sand or polish it without creating a permanent shiny spot. These usually require a professional who specializes in non-glossy finishes.
What should I do if the paint “blobs” and dries too high?
If the paint dries into a tall bump, you can use a leveling fluid or carefully wet sand it down with a sanding block until it is flush with the rest of the panel. Once it is flat, polish it to restore the shine.